Tuesday, March 18, 2014

PDF password protection

In this tutorial, I am going to show you how to protect a PDF document by passwords so that users that do not have permissions cannot open or modify the content of the PDF document. You can set two passwords to the PDF document,  a user password and an owner password. The user password must be entered before the PDF document can be opened in Adobe Reader or Foxit Reader. The owner password applies restrictions to the PDF document. For example, you can  allow only printing and copying to the PDF document.
By using iText library you can set the passwords to the PDF document by using the setEncryption method of PdfWriter class. The general form of the setEncryption method is shown below:

setEncryption(byte[] userPassword, byte[] ownerPassword, int permissions, int encryptionType)

- userPassword--an array of bytes that is the user password.

- ownerPassword--an array of bytes that is the owner password.

- permissions--permissions or restrictions that will be applied to the PDF document. These permissions can be AllowPrinting, AllowCopy, AllowScreenReaders, AllowFillIn, AllowAssembly, or AllowDegradedPrinting.
- encryptionType--the type of encryption. The encryption type can be one of the following STANDARD_ENCRYPTION_40, STANDARD_ENCRYPTION_128 or ENCRYPTION_AES128.

Example:

import java.awt.Desktop;
import java.io.File;
import java.io.FileOutputStream;
import com.itextpdf.text.Document;
import com.itextpdf.text.Paragraph;
import com.itextpdf.text.pdf.PdfWriter;


public class PdfItext {
public static void main(String[] args){
setPasswords();
}

static void setPasswords(){
try{
//create a document object
Document doc = new Document();
//FileOutputStream object to write the pdf file
String path="d:/pdfdocprotected.pdf";
FileOutputStream fos=new FileOutputStream(path);
//get PdfWriter object
PdfWriter writer =PdfWriter.getInstance(doc,fos);
//convert strings of passwords to arrays of bytes
byte[] USER="Hello".getBytes();
byte[] OWNER="world".getBytes();
//spcify encryption of the document
writer.setEncryption(USER, OWNER, PdfWriter.ALLOW_PRINTING,

PdfWriter.ENCRYPTION_AES_256);          
      writer.createXmpMetadata();
//open the document for writing
doc.open();
//write a paragraph to the document
doc.add(new Paragraph("This PDF document is protected."));
//close the document
doc.close();
//view the result pdf file
Desktop dt=Desktop.getDesktop();
if(Desktop.isDesktopSupported()){
dt.open(new File(path));
}
}catch(Exception e){e.printStackTrace();}
}
}

When you run the example code above, you might get the dependency error as shown below. To fix the error, you will download the extra jar files from http://sourceforge.net/projects/itext/files/extrajars/. Then extract the zip file and add the bcprov-jdk15on-1.48.jar file to the project. After that, run the program again.

ASN1Encodable not found error


PDF Viewer - Reader

Monday, March 10, 2014

iText


iText is known to be an open source free library to create and manipulate PDF files in Java programming language. This useful library is originally developed by Bruno Lowagie and others since 2001. In this tutorial, I am going to show you how to configure iText library in Eclipse and create a PDF file to display the Hello World text.
To get start, you need to create a Java project in Eclipse. After the process of project creation  completes, you will download the latest iText library from the URL: http://sourceforge.net/projects/itext/files/latest/download. You will get the iText library in zip file format. Simply extract the zip file to a folder in your computer. In the folder, you will see a lot of jar files. However, the main one is itextpdf-5.5.0.jar. You need to add this jar file to the Java project before you begin writing Java code to create a PDF file or manipulate the file. To add the jar file to your current Java project in Eclipse, you will select Properties... from the Project menu. When the Properties dialog displays, click Java Build Path->Libraries. Then click Add External Libraries...A file dialog is open. Navigate to the folder that contains the itextpdf-5.5.0.jar. Select the file and click OK. Now the iText library is added to your project.

create pdf in itext

To create a PDF file, first you need to create a class in the project. You can name the class whatever you want. However, in this tutorial, the name of the class is PdfItext. Below is an example Java code to create a PDF file by using iText library.

import java.awt.Desktop;
import java.io.File;
import java.io.FileOutputStream;
import com.itextpdf.text.Document;
import com.itextpdf.text.Paragraph;
import com.itextpdf.text.pdf.PdfWriter;

public class PdfItext {
public static void main(String[] args){
createPdf();
}

static void createPdf(){
try{
//create a document object
Document doc = new Document();
//FileOutputStream object to write the pdf file
FileOutputStream fos=new FileOutputStream("pdfdoc.pdf");
//get PdfWriter object
PdfWriter.getInstance(doc,fos);
//open the document for writing
doc.open();
//write a paragraph to the document
doc.add(new Paragraph("Hello World"));
//close the document
doc.close();
//view the result pdf file
Desktop dt=Desktop.getDesktop();
if(Desktop.isDesktopSupported()){
dt.open(new File("pdfdoc.pdf"));
}
}catch(Exception e){e.printStackTrace();}
}
}

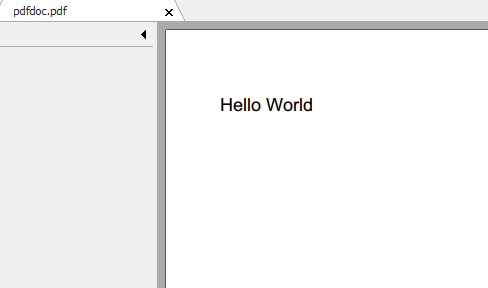
The Java code above creates a PDF file called pdfdoc.pdf in the current working folder of your project. iText does five steps to create the PDF file you:
-Create a PDF document object.
-Get PDFWriter object.
-Open the document.
-Write content to the document.
-Close the document.


compass app